Connecting to a Controller
EnterprisePoint NetStacks Terminal at your organization's Controller: set the Controller URL, verify and trust its certificate, sign in, switch organizations and return to standalone mode.
Overview
In enterprise mode, NetStacks Terminal works against your organization's NetStacks Controller instead of its own Local Agent. You get the team's shared device inventory. The Controller makes the SSH connections, so device credentials stay on the server, and your access follows the roles an administrator gave you.
The mode is chosen when the app starts. Connecting to a Controller, switching to a different one, or going back to standalone mode always restarts the app. Your standalone sessions, vault and settings are not deleted. They are there again when you return to standalone mode.
Before You Start
Ask your Controller administrator for:
- The Controller URL, for example
https://controller.example.com:3000. The Controller always uses HTTPS; if you typehttp://, the Terminal changes it tohttps://. - Your username and password. The Terminal signs in with a Controller username and password; there is no SSO button on the sign-in screen.
- The Controller's CA fingerprint (SHA-256), so you can check the certificate before you trust it. Administrators can read it in a Terminal that is already connected (Settings → Enterprise → CA Fingerprint (SHA-256)) or fetch it from the Controller's public endpoint:
curl -sk https://controller.example.com:3000/api/tls/ca-certificate/info
Signing in from the Terminal uses one license seat. The Controller needs an active license with a free seat.
Step 1: Set the Controller URL
On first launch
- On the master-password screen, click Sign in to a Controller instead.
- Enter the Controller URL and click Save & restart. (Back to local vault cancels.)
From Settings (standalone mode)
- Open Settings (Cmd+, on macOS, Ctrl+, on Windows and Linux) and choose the Enterprise tab.
- Under Controller Connection, enter the Controller URL and click Save & Restart.
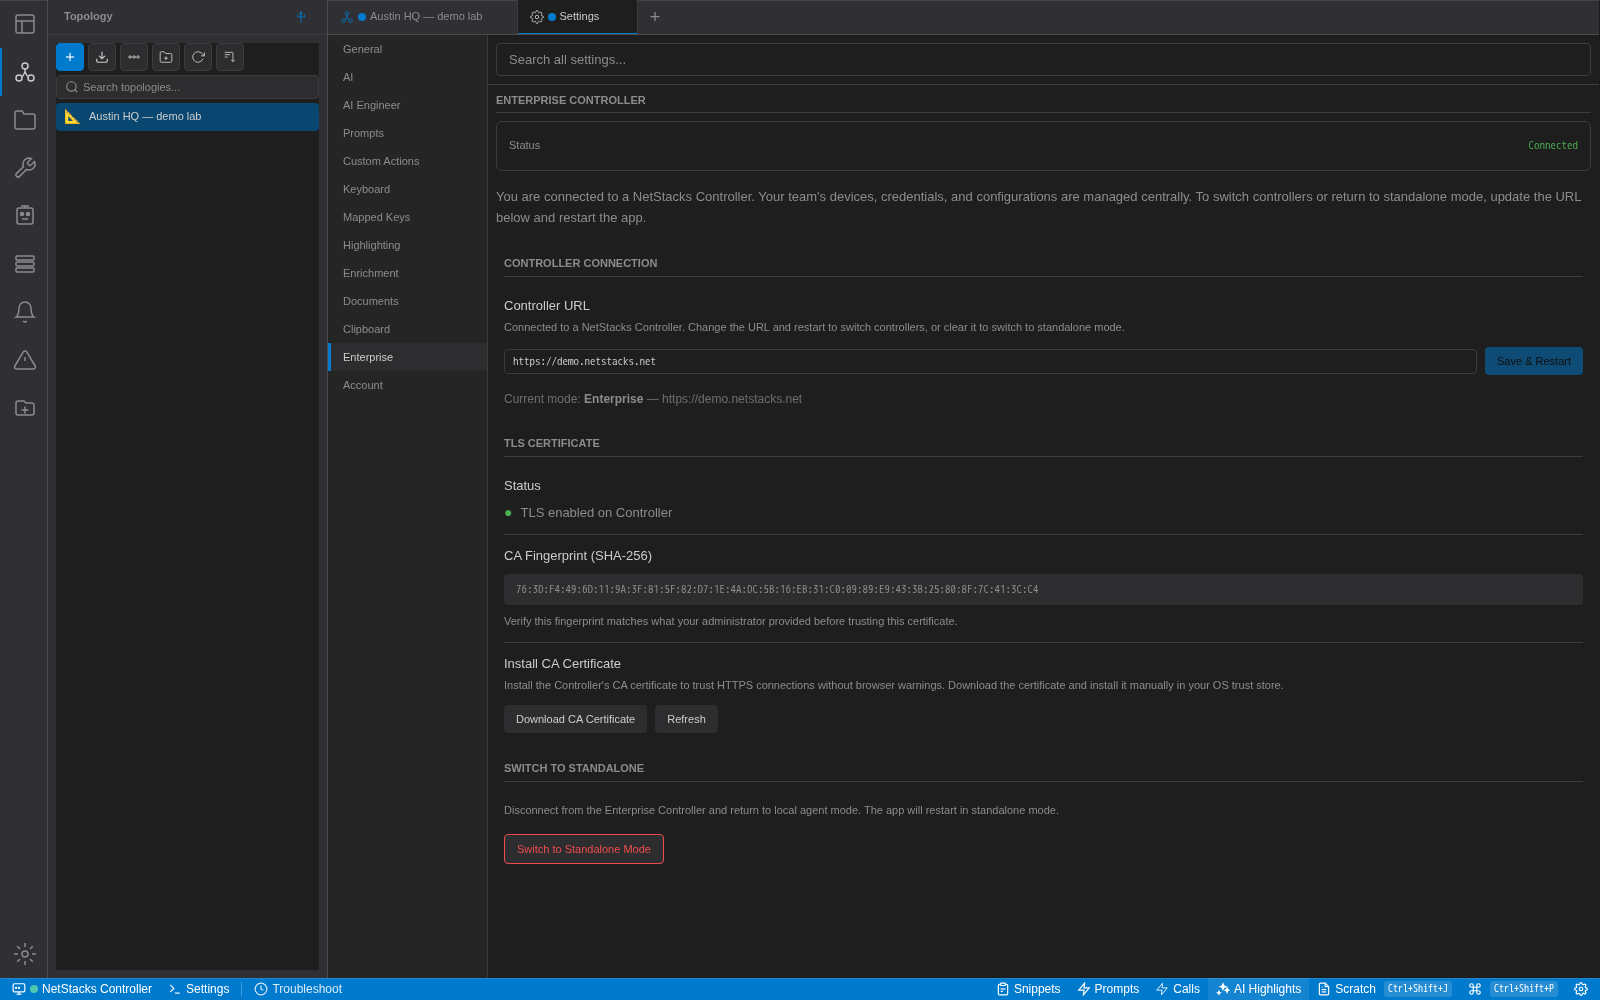
Settings → Enterprise when connected. This tab shows the Controller URL, the current mode, the Controller's CA fingerprint, and the option to switch back to standalone mode.
Step 2: Trust the Controller Certificate
Out of the box, the Controller uses a certificate signed by its own private CA. When the Terminal restarts in enterprise mode, a dialog titled Untrusted Controller Certificate shows the Controller URL and the certificate fingerprint.
- Compare the fingerprint with the one your administrator gave you.
- If it matches, click OK. NetStacks installs the Controller CA in your operating system's trust store and restarts once:
- macOS: your login keychain (macOS may ask for your password).
- Windows: your user's trusted root store (confirm the Windows prompt).
- Linux: the system CA store (a polkit password prompt appears).
- If it doesn't match, click Cancel and contact your administrator.
If you cancel, or the Terminal still can't verify the certificate, you see a Cannot Connect screen. Click Trust Certificate… to fetch the CA again. Then paste the expected fingerprint into the box and click Verify & Install. If the pasted value doesn't match, NetStacks refuses to install the certificate. Install (visual check only) skips the paste step. Retry tries the connection again.
The Terminal remembers the trusted fingerprint for each Controller. If the Controller's CA ever changes, a Certificate Changed warning appears instead of connecting. Treat it as a possible security problem and check with your administrator.
If the Controller already presents a certificate your computer trusts, for example one issued by your company's internal CA that is already installed, no trust prompt appears.
Step 3: Sign In
The NetStacks Enterprise screen (“Sign in to your organization”) appears. Enter your Username and Password and click Sign In.
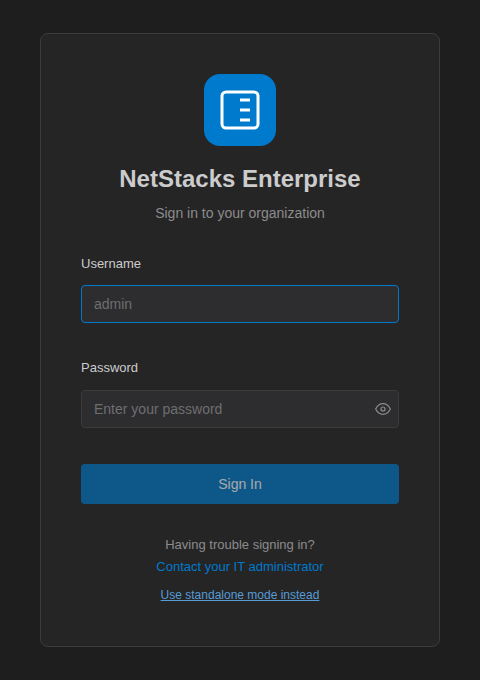
The enterprise sign-in screen. If all license seats are in use, it shows “All license seats are in use. Please try again later or contact your administrator.”
For security, sign-in tokens are kept in memory only, so you sign in again each time the app starts. To sign out, open Settings → Account and click Sign Out. After a period of inactivity, a warning dialog lets you stay signed in before the session ends.
What Changes in Enterprise Mode
- The first activity-bar icon opens Devices (the Controller's inventory) instead of Sessions. You can search, filter by Source, Type and Site, and mark favorites.
- Right-clicking a device gives Connect, Add to Favorites, Edit Device, View Latest Backup and Backup History.
- Depending on your role and the Controller's license and plugins, extra panels appear: Stacks, Alerts and Incidents.
- Settings that only apply to the Local Agent are hidden: Security (vault), Trusted Hosts, Profiles, Jump Hosts, Tunnels, Workspaces, Integrations, Snippets, Recordings, Layouts, Session Logs and Troubleshooting. A new Account tab shows your account, your personal Controller profiles and your SSH certificate status.
- The AI assistant uses the LLM providers configured on the Controller.
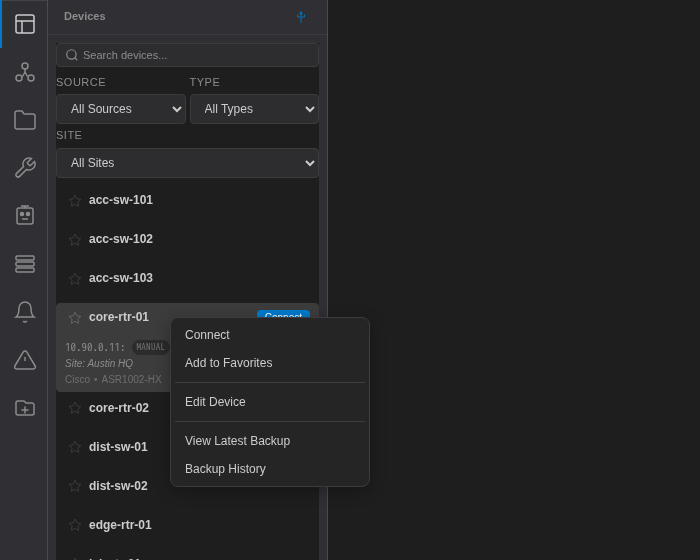
The Devices sidebar with a device's right-click menu.
The status bar's bottom-left item shows the Controller's name and a connection dot. Click it to see your user, organization, roles, permissions, the Controller URL, the license tier and the enabled features.
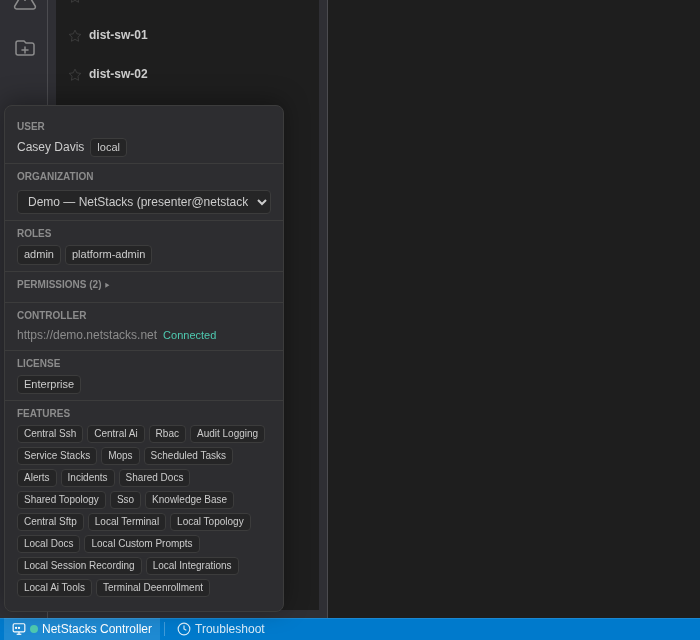
The Controller popover, opened from the status bar.
Switching Organizations
A Controller can host several organizations. Regular users always work in their own organization. Platform administrators can switch: in the Controller popover, the Organization field becomes a drop-down (your home organization is marked “(home)”). Choose another organization and the Terminal reloads with that organization's devices and data.
In the admin console, platform administrators use the organization switcher in the header. The console's Terminal link opens the web terminal in the organization that is currently selected.
Using the Web Terminal Instead
You don't have to install anything to use a Controller. Open https://<controller-host>:3000/terminal/ in a browser, or click Terminal in the admin console header, and sign in with the same username and password. The web terminal is always in enterprise mode. It doesn't have the desktop-only features, such as the local shell, Workspaces, native window controls and the updater.
Returning to Standalone Mode
Any of these restarts the app in standalone mode:
- On the sign-in screen, click Use standalone mode instead and confirm Switch to standalone.
- In Settings → Enterprise, click Switch to Standalone Mode and confirm. This button appears only if the Controller allows it.
- In Settings → Enterprise, clear the Controller URL and click Save & Restart.
In standalone mode you no longer have access to the Controller's devices, MOPs and shared resources until you connect again.
Troubleshooting
“Controller Certificate — Address Not Covered”
The Controller's certificate doesn't list the hostname or IP address you typed, so your operating system rejects it even if you trust the CA. The administrator needs to add that name to the certificate's Subject Alternative Names under Settings → TLS / SSL in the admin console. Then restart the Controller's containers so it issues a new certificate. Until then, use a hostname the certificate already covers.
“Cannot Connect”
Check that the URL (including the port, normally :3000) opens in a browser on the same computer, and that no firewall or proxy blocks it. Use Trust Certificate… if the message mentions an untrusted certificate.
Sign-in fails
Make sure you are using a Controller account, not your device credentials. If you see the license-seat message, wait for a seat to free up or ask your administrator to add seats. For anything else, ask your administrator to check that your account exists and has a role assigned.